How to Add an Image Slider in Blogger (Using HTML, CSS & JS)

An image slider is a great way to make your Blogger website visually appealing and interactive. Whether you want to showcase images, display featured posts, or create an engaging homepage, a slider can do the job.
In this tutorial, we’ll walk you through the steps to add an image slider to your Blogger website using simple HTML, CSS, and JavaScript.
- Go to the Layout section.
- Click Add a Gadget in the area where you want to add the slider (e.g., your homepage).
- Choose the HTML/JavaScript gadget.
Image Slider 1

First of all, You need to Upload all images in same size and aspect ratio and Copy all image Source URLs in some notepad files.
Below is the code you need to copy and paste into the HTML/JavaScript gadget. Make sure to change the Image URLs here. You can also add Links to each images so, it will open that respective posts or any link you have assigned to these images.
<div class="wrapper">
    <button id="left" class="arrow prev" aria-label="Previous">
        <svg width="12" height="12" viewBox="0 0 24 24" fill="none" xmlns="http://www.w3.org/2000/svg">
            <path d="M15 18L9 12L15 6" stroke="#343F4F" stroke-width="2" stroke-linecap="round" stroke-linejoin="round"/>
        </svg>
    </button>
    <div class="carousel">
        <a href="https://example.com/link1" target="_blank">
            <img src="https://images.pexels.com/photos/3561009/pexels-photo-3561009.jpeg?auto=compress&cs=tinysrgb&w=600" alt="img 1" draggable="false">
        </a>
        <a href="https://example.com/link2" target="_blank">
            <img src="https://images.pexels.com/photos/4348404/pexels-photo-4348404.jpeg?auto=compress&cs=tinysrgb&w=600" alt="img 2" draggable="false">
        </a>
        <a href="https://example.com/link3" target="_blank">
            <img src="https://images.pexels.com/photos/933255/pexels-photo-933255.jpeg?auto=compress&cs=tinysrgb&w=600" alt="img 3" draggable="false">
        </a>
        <a href="https://example.com/link4" target="_blank">
            <img src="https://images.pexels.com/photos/123335/pexels-photo-123335.jpeg?auto=compress&cs=tinysrgb&w=600" alt="img 4" draggable="false">
        </a>
    </div>
    <button id="right" class="arrow next" aria-label="Next">
        <svg width="12" height="12" viewBox="0 0 24 24" fill="none" xmlns="http://www.w3.org/2000/svg">
            <path d="M9 18L15 12L9 6" stroke="#343F4F" stroke-width="2" stroke-linecap="round" stroke-linejoin="round"/>
        </svg>
    </button>
</div>


<style>
.wrapper {
    display: flex;
    max-width: 1200px;
    position: relative;
}

.arrow {
    display: flex;
    justify-content: center;
    align-items: center;
    top: 50%;
    height: 44px;
    width: 44px;
    background: #fff;
    cursor: pointer;
    position: absolute;
    transform: translateY(-50%);
    border-radius: 50%;
    box-shadow: 0 2px 4px rgba(0, 0, 0, 0.1);
    transition: background 0.2s, transform 0.1s linear;
    border: none;
}

.arrow.prev {
    left: -22px;
    display: none;
    z-index: 50;
}

.arrow.next {
    right: -22px;
}

.arrow svg {
    width: 15px;
    height: 15px;
}

.arrow:hover {
    background: #f2f2f2;
}

.arrow:active {
    transform: translateY(-50%) scale(0.9);
}

.carousel {
    font-size: 0px;
    cursor: pointer;
    overflow: hidden;
    white-space: nowrap;
    scroll-behavior: smooth;
}

.carousel.dragging {
    cursor: grab;
    scroll-behavior: auto;
}

.carousel.dragging img {
    pointer-events: none;
}

.carousel img {
    height: 340px;
    object-fit: cover;
    user-select: none;
    width: calc(100% / 3);
    box-shadow: rgba(0, 0, 0, 0.15) 1.95px 1.95px 2.6px;
}

.carousel a {
    margin-left: 14px;
}

.carousel a:first-child {
    margin-left: 0;
}

@media screen and (max-width: 900px) {
    .carousel img {
        width: calc(100% / 2);
    }
}

@media screen and (max-width: 550px) {
    .carousel img {
        width: 100%;
    }
}
</style>

<script>
const carousel = document.querySelector(".carousel"),
    firstImg = carousel.querySelectorAll("img")[0],
    arrowIcons = document.querySelectorAll(".wrapper .arrow");

let isDragStart = false, isDragging = false, prevPageX, prevScrollLeft, positionDiff;

const showHideIcons = () => {
    let scrollWidth = carousel.scrollWidth - carousel.clientWidth;
    arrowIcons[0].style.display = carousel.scrollLeft == 0 ? "none" : "block";
    arrowIcons[1].style.display = carousel.scrollLeft == scrollWidth ? "none" : "block";
};

arrowIcons.forEach(icon => {
    icon.addEventListener("click", () => {
        let firstImgWidth = firstImg.clientWidth + 14;

        carousel.scrollLeft += icon.classList.contains("prev") ? -firstImgWidth : firstImgWidth;
        setTimeout(() => showHideIcons(), 60);
    });
});

const autoSlide = () => {
    if (carousel.scrollLeft - (carousel.scrollWidth - carousel.clientWidth) > -1 || carousel.scrollLeft <= 0) return;

    positionDiff = Math.abs(positionDiff);
    let firstImgWidth = firstImg.clientWidth + 14;
    let valDifference = firstImgWidth - positionDiff;

    if (carousel.scrollLeft > prevScrollLeft) {
        carousel.scrollLeft += positionDiff > firstImgWidth / 3 ? valDifference : -positionDiff;
    } else { // Scrolling left
        carousel.scrollLeft -= positionDiff > firstImgWidth / 3 ? valDifference : -positionDiff;
    }
};

const dragStart = (e) => {
    isDragStart = true;
    prevPageX = e.pageX || e.touches[0].pageX;
    prevScrollLeft = carousel.scrollLeft;
};

const dragging = (e) => {
    if (!isDragStart) return;
    e.preventDefault();
    isDragging = true;
    carousel.classList.add("dragging");
    positionDiff = (e.pageX || e.touches[0].pageX) - prevPageX;
    carousel.scrollLeft = prevScrollLeft - positionDiff;
    showHideIcons();
};

const dragStop = () => {
    isDragStart = false;
    carousel.classList.remove("dragging");

    if (!isDragging) return;
    isDragging = false;
    autoSlide();
};

carousel.addEventListener("mousedown", dragStart);
carousel.addEventListener("touchstart", dragStart);

document.addEventListener("mousemove", dragging);
carousel.addEventListener("touchmove", dragging);

document.addEventListener("mouseup", dragStop);
carousel.addEventListener("touchend", dragStop);

showHideIcons();

</script>
After pasting the code, click the Save button. View your blog to see the slider in action.
Image slider with Auto Scroll Enabled
<div class="wrapper">
    <button id="left" class="arrow prev" aria-label="Previous">
        <svg width="12" height="12" viewBox="0 0 24 24" fill="none" xmlns="http://www.w3.org/2000/svg">
            <path d="M15 18L9 12L15 6" stroke="#343F4F" stroke-width="2" stroke-linecap="round" stroke-linejoin="round" />
        </svg>
    </button>
    <div class="carousel">
        <a href="https://example.com/link1" target="_blank">
            <img src="https://images.pexels.com/photos/3561009/pexels-photo-3561009.jpeg?auto=compress&cs=tinysrgb&w=600" alt="img 1" draggable="false">
        </a>
        <a href="https://example.com/link2" target="_blank">
            <img src="https://images.pexels.com/photos/4348404/pexels-photo-4348404.jpeg?auto=compress&cs=tinysrgb&w=600" alt="img 2" draggable="false">
        </a>
        <a href="https://example.com/link3" target="_blank">
            <img src="https://images.pexels.com/photos/933255/pexels-photo-933255.jpeg?auto=compress&cs=tinysrgb&w=600" alt="img 3" draggable="false">
        </a>
        <a href="https://example.com/link4" target="_blank">
            <img src="https://images.pexels.com/photos/123335/pexels-photo-123335.jpeg?auto=compress&cs=tinysrgb&w=600" alt="img 4" draggable="false">
        </a>
    </div>
    <button id="right" class="arrow next" aria-label="Next">
        <svg width="12" height="12" viewBox="0 0 24 24" fill="none" xmlns="http://www.w3.org/2000/svg">
            <path d="M9 18L15 12L9 6" stroke="#343F4F" stroke-width="2" stroke-linecap="round" stroke-linejoin="round" />
        </svg>
    </button>
</div>

<style>
.wrapper {
    display: flex;
    max-width: 1200px;
    position: relative;
}

.arrow {
    display: flex;
    justify-content: center;
    align-items: center;
    top: 50%;
    height: 44px;
    width: 44px;
    background: #fff;
    cursor: pointer;
    position: absolute;
    transform: translateY(-50%);
    border-radius: 50%;
    box-shadow: 0 2px 4px rgba(0, 0, 0, 0.1);
    transition: background 0.2s, transform 0.1s linear;
    border: none;
}

.arrow.prev {
    left: -22px;
    display: none;
    z-index: 50;
}

.arrow.next {
    right: -22px;
}

.arrow svg {
    width: 12px;
    height: 12px;
}

.arrow:hover {
    background: #f2f2f2;
}

.arrow:active {
    transform: translateY(-50%) scale(0.9);
}

.carousel {
    font-size: 0px;
    cursor: pointer;
    overflow: hidden;
    white-space: nowrap;
    scroll-behavior: smooth;
}

.carousel.dragging {
    cursor: grab;
    scroll-behavior: auto;
}

.carousel.dragging img {
    pointer-events: none;
}

.carousel img {
    height: 340px;
    object-fit: cover;
    user-select: none;
    width: calc(100% / 3);
    box-shadow: rgba(0, 0, 0, 0.15) 1.95px 1.95px 2.6px;
}

.carousel a {
    margin-left: 14px;
}

.carousel a:first-child {
    margin-left: 0;
}

@media screen and (max-width: 900px) {
    .carousel img {
        width: calc(100% / 2);
    }
}

@media screen and (max-width: 550px) {
    .carousel img {
        width: 100%;
    }
}
</style>

<script>
const carousel = document.querySelector(".carousel"),
    firstImg = carousel.querySelectorAll("img")[0],
    arrowIcons = document.querySelectorAll(".wrapper .arrow");

let isDragStart = false, isDragging = false, prevPageX, prevScrollLeft, positionDiff;
let autoScrollInterval;

const showHideIcons = () => {
    let scrollWidth = carousel.scrollWidth - carousel.clientWidth;
    arrowIcons[0].style.display = carousel.scrollLeft == 0 ? "none" : "flex";
    arrowIcons[1].style.display = carousel.scrollLeft == scrollWidth ? "none" : "flex";
};

const startAutoScroll = () => {
    autoScrollInterval = setInterval(() => {
        let firstImgWidth = firstImg.clientWidth + 14;
        carousel.scrollLeft += firstImgWidth;

        if (carousel.scrollLeft >= carousel.scrollWidth - carousel.clientWidth) {
            carousel.scrollLeft = 0;
        }
        showHideIcons();
    }, 3000);
};

const stopAutoScroll = () => {
    clearInterval(autoScrollInterval);
};

// Call the startAutoScroll function
startAutoScroll();

arrowIcons.forEach(icon => {
    icon.addEventListener("click", () => {
        stopAutoScroll();
        let firstImgWidth = firstImg.clientWidth + 14;
        carousel.scrollLeft += icon.classList.contains("prev") ? -firstImgWidth : firstImgWidth;
        setTimeout(() => showHideIcons(), 60);
        startAutoScroll(); // Resume auto-scroll after manual scroll
    });
});

const autoSlide = () => {
    if (carousel.scrollLeft - (carousel.scrollWidth - carousel.clientWidth) > -1 || carousel.scrollLeft <= 0) return;
    positionDiff = Math.abs(positionDiff);
    let firstImgWidth = firstImg.clientWidth + 14;
    let valDifference = firstImgWidth - positionDiff;

    if (carousel.scrollLeft > prevScrollLeft) {
        carousel.scrollLeft += positionDiff > firstImgWidth / 3 ? valDifference : -positionDiff;
    } else {
        carousel.scrollLeft -= positionDiff > firstImgWidth / 3 ? valDifference : -positionDiff;
    }
};

const dragStart = (e) => {
    stopAutoScroll();
    isDragStart = true;
    prevPageX = e.pageX || e.touches[0].pageX;
    prevScrollLeft = carousel.scrollLeft;
};

const dragging = (e) => {
    if (!isDragStart) return;
    e.preventDefault();
    isDragging = true;
    carousel.classList.add("dragging");
    positionDiff = (e.pageX || e.touches[0].pageX) - prevPageX;
    carousel.scrollLeft = prevScrollLeft - positionDiff;
    showHideIcons();
};

const dragStop = () => {
    isDragStart = false;
    carousel.classList.remove("dragging");
    if (!isDragging) return;
    isDragging = false;
    autoSlide();
    startAutoScroll();
};

carousel.addEventListener("mousedown", dragStart);
carousel.addEventListener("touchstart", dragStart);

document.addEventListener("mousemove", dragging);
carousel.addEventListener("touchmove", dragging);

document.addEventListener("mouseup", dragStop);
carousel.addEventListener("touchend", dragStop);

showHideIcons();

</script>
Image slider 2
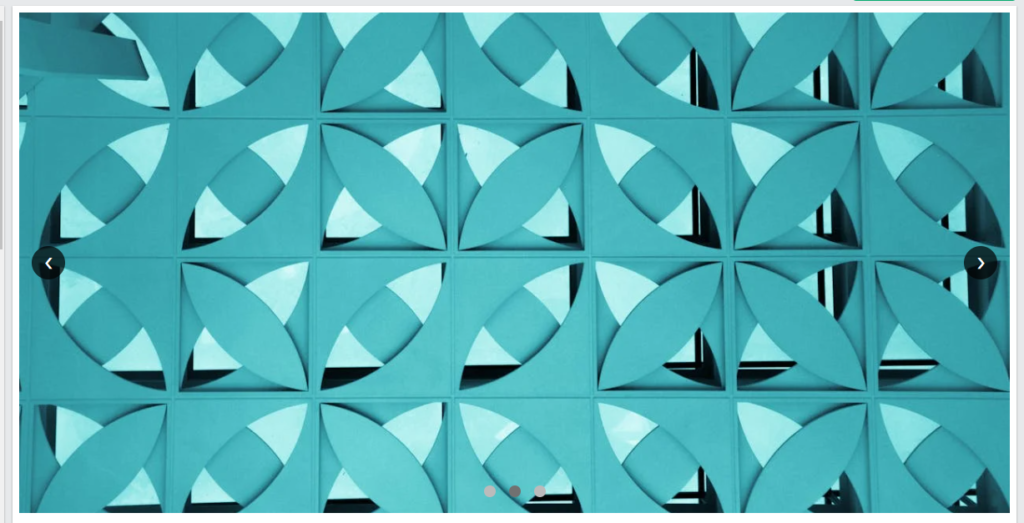
You can use the below code to create an image slider like this as shown in the below screenshot.

<style>
.slider-container {
position: relative;
max-width: 100%;
height: 400px; /* Fixed height for slider */
overflow: hidden;
}
.slide {
display: none;
width: 100%;
height: 100%;
position: relative;
}
.slider img {
width: 100%;
height: 100%;
object-fit: cover;
}
.prev, .next {
position: absolute;
top: 50%;
font-size: 18px;
color: #fff;
background-color: rgba(0, 0, 0, 0.7);
width: 40px;
height: 40px;
display: flex;
align-items: center;
justify-content: center;
cursor: pointer;
border-radius: 50%;
transform: translateY(-50%);
transition: background-color 0.3s;
user-select: none;
z-index: 10;
}
.prev:hover, .next:hover {
background-color: rgba(0, 0, 0, 0.9);
}
.prev { left: 15px; }
.next { right: 15px; }
.dots {
text-align: center;
position: absolute;
bottom: 15px;
width: 100%;
z-index: 10;
}
.dot {
height: 14px;
width: 14px;
margin: 0 6px;
background-color: #bbb;
border-radius: 50%;
display: inline-block;
cursor: pointer;
transition: background-color 0.3s;
}
.active, .dot:hover {
background-color: #717171;
}
/* Responsive Styles for Mobile */
@media (max-width: 768px) {
.prev, .next {
width: 30px;
height: 30px;
font-size: 14px;
}
.slider-container {
height: 350px; /* Fixed height for Mobile */
}
}
</style>
<div class="slider-container">
<!-- Slide 1 -->
<div class="slide">
<a href="https://example.com/page1"><img src="https://images.pexels.com/photos/414974/pexels-photo-414974.jpeg?auto=compress&cs=tinysrgb&w=1260&h=750&dpr=1" alt="Slide 1"></a>
</div>
<!-- Slide 2 -->
<div class="slide">
<a href="https://example.com/page2"><img src="https://images.pexels.com/photos/325649/pexels-photo-325649.jpeg?auto=compress&cs=tinysrgb&w=1260&h=750&dpr=1" alt="Slide 2"></a>
</div>
<!-- Slide 3 -->
<div class="slide">
<a href="https://example.com/page3"><img src="https://images.pexels.com/photos/572056/pexels-photo-572056.jpeg?auto=compress&cs=tinysrgb&w=1260&h=750&dpr=1" alt="Slide 3"></a>
</div>
<!-- Navigation Buttons -->
<a class="prev" onclick="plusSlides(-1)">❮</a>
<a class="next" onclick="plusSlides(1)">❯</a>
<div class="dots">
<span class="dot" onclick="currentSlide(1)"></span>
<span class="dot" onclick="currentSlide(2)"></span>
<span class="dot" onclick="currentSlide(3)"></span>
</div>
</div>
<script>
let slideIndex = 1;
showSlides(slideIndex);
function plusSlides(n) {
showSlides(slideIndex += n);
}
function currentSlide(n) {
showSlides(slideIndex = n);
}
function showSlides(n) {
let slides = document.getElementsByClassName("slide");
let dots = document.getElementsByClassName("dot");
if (n > slides.length) { slideIndex = 1 }
if (n < 1) { slideIndex = slides.length }
for (let i = 0; i < slides.length; i++) {
slides[i].style.display = "none";
}
for (let i = 0; i < dots.length; i++) {
dots[i].className = dots[i].className.replace(" active", "");
}
slides[slideIndex - 1].style.display = "block";
dots[slideIndex - 1].className += " active";
}
setInterval(function() {
plusSlides(1);
}, 5000);
</script>
Conclusion
Adding an image slider to your Blogger website is simple and enhances its visual appeal. With just HTML, CSS, and JavaScript, you can create a fully functional and responsive slider. Now, you can showcase your content in style and keep your visitors engaged!
Don’t forget to Join Our Telegram Group for Regular updates.
☑️More: How to Hide Featured Thumbnail Image from Blogger Post
If you found this guide helpful, feel free to share it with others. Happy blogging! 😊


Thank you so much…
How can we place links to the images, kindly?
Thank you for this query. I have updated the code with Link Feature, so you can now add links to each of the images in the slider.
Just Woow!. Its working perfectly, thank you.