How to Get a Free Domain Name from Hostinger
Whether you want to start your online store or want to create a blog website to start making money online, you need a domain name for your website. Hostinger is the best option if you are looking for the best budget-friendly domain and hosting.
In this article, I will show you how to take advantage of Hostinger’s offer and obtain a free domain name for your website.
Why do you need a custom Domain Name?
You may ask why not use a free domain name from providers like Blogger.com and what’s the benefit of using a custom domain?
Having a personalized domain name offers several advantages. It adds a professional touch to your website, making it easier for visitors to remember and find you online.
A domain name also allows you to create customized email addresses, reinforcing your brand identity in communication with clients or readers. Additionally, it enhances your website’s search engine optimization (SEO) potential, helping you rank higher in search engine results.
Brief About Hostinger
When it comes to web hosting services, Hostinger stands out as a trusted provider known for its affordability, reliability, and excellent customer support.
Not only does Hostinger offer feature-rich hosting plans, but they also provide an opportunity to obtain a free domain name along with their hosting packages. It makes Hostinger an attractive option for individuals and businesses looking to establish their online presence without breaking the bank.
I am personally using the Hostinger Premium Shared Hosting plan for my Wordpress website “Key2Blogging“.
Steps To Get a Free Domain Name from Hostinger
1. Visit Hostinger Website.
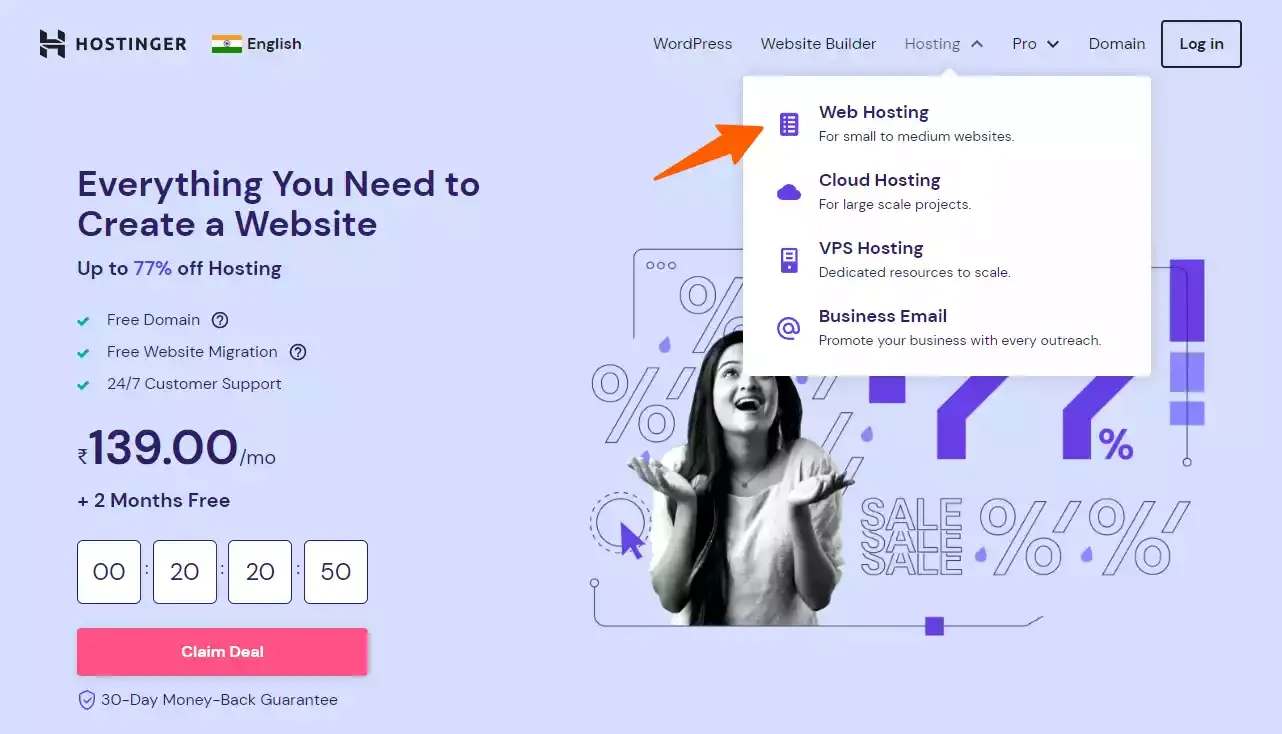
First, Login to the Hostinger Website, and under the menu select the Webhosting Option.
2. Select the Premium or Business Shared hosting plan.
If you want to create a Blog website, a Premium shared hosting plan is the right option for you. And if you want to start an Online store in Wordpress, a Business shared hosting plan is for you.
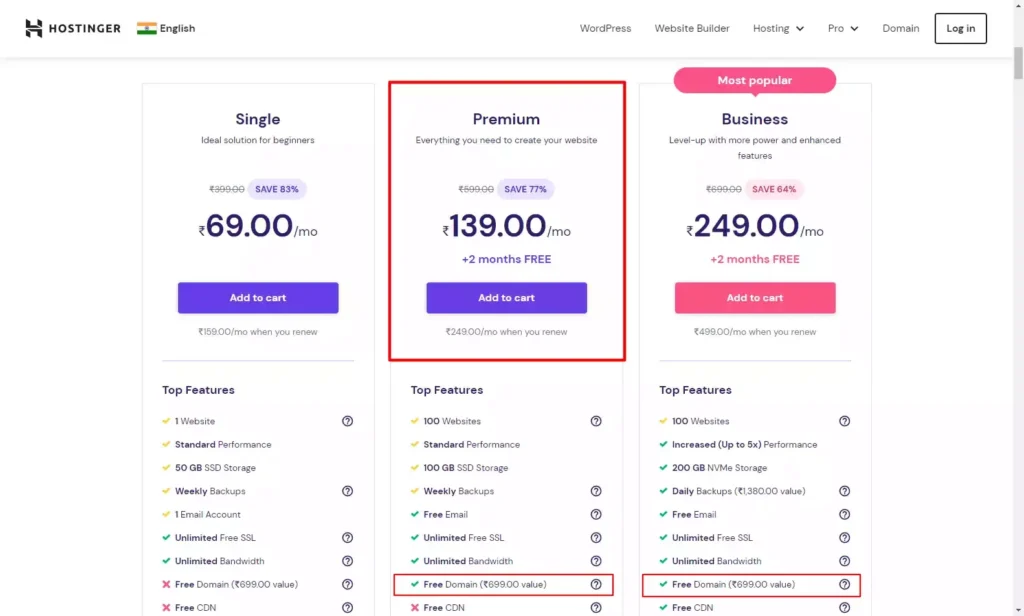
Now click on the Add to Cart Button. Now it will ask you to choose a time period. I recommend you to take the plan at least for 1 or 2 years and you can upgrade it to higher plans later.
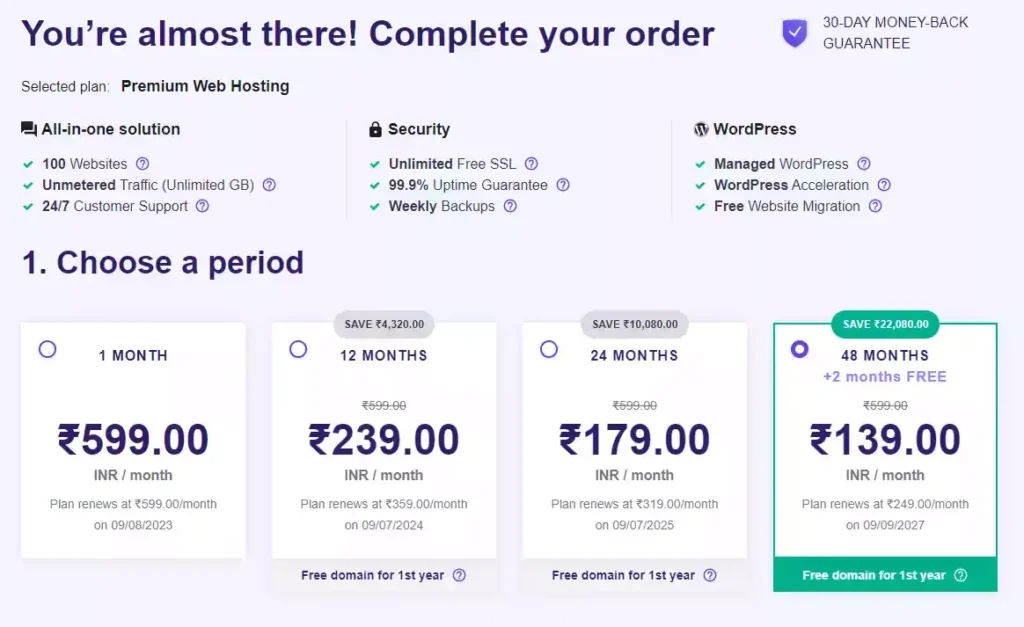
Now Create a Hostinger Account by entering the Email address and phone number or you can signup through Google or Facebook account.

Now choose your Preferred payment method and don’t forget to enter the Coupon Code [ PREMIUM8 ] for an 8% Additional Discount. Follow the Link to Claim the Discount on Hostinger.
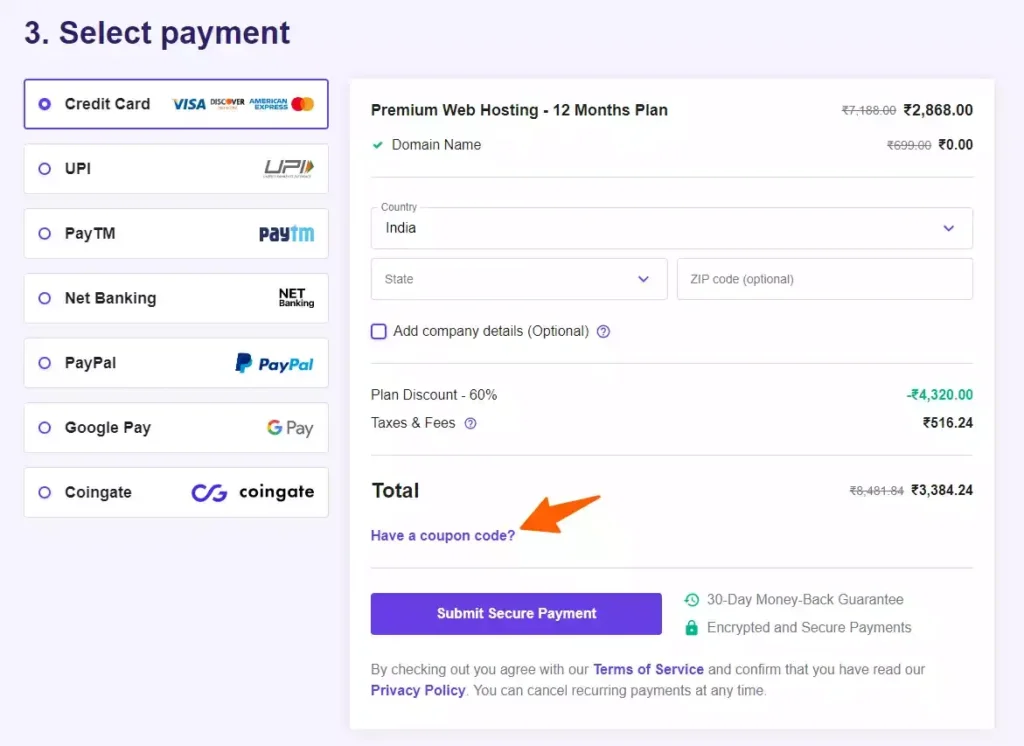
Now After payment, you will be redirected to the Hostinger dashboard.
Also, you will get an Email verification link from the hostinger in your Main inbox. Just click on the link to verify your email in hostinger
3. Claim Your Free Domain Name
Now you have purchased hostinger Hosting, let’s check how you can claim a free domain name in it.
Login to your Hpanel and click on the “Websites” option in the header menu.

Here, Click on the Create or Migrate a website box.
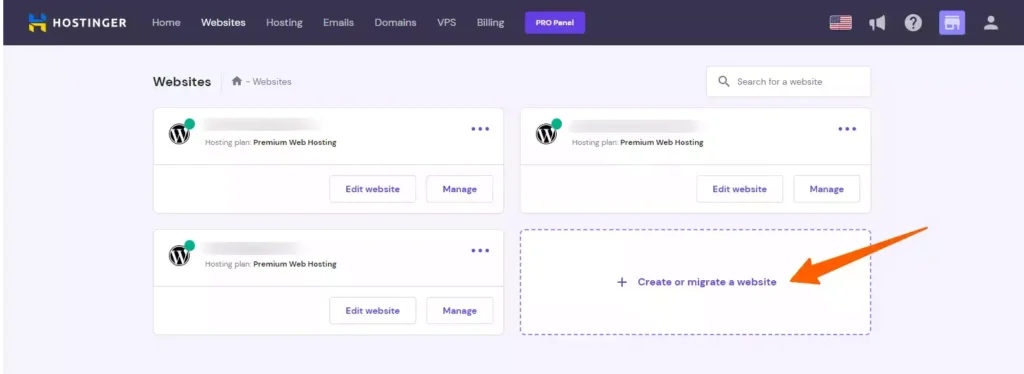
Now click on the skip button as shown in the below screenshot

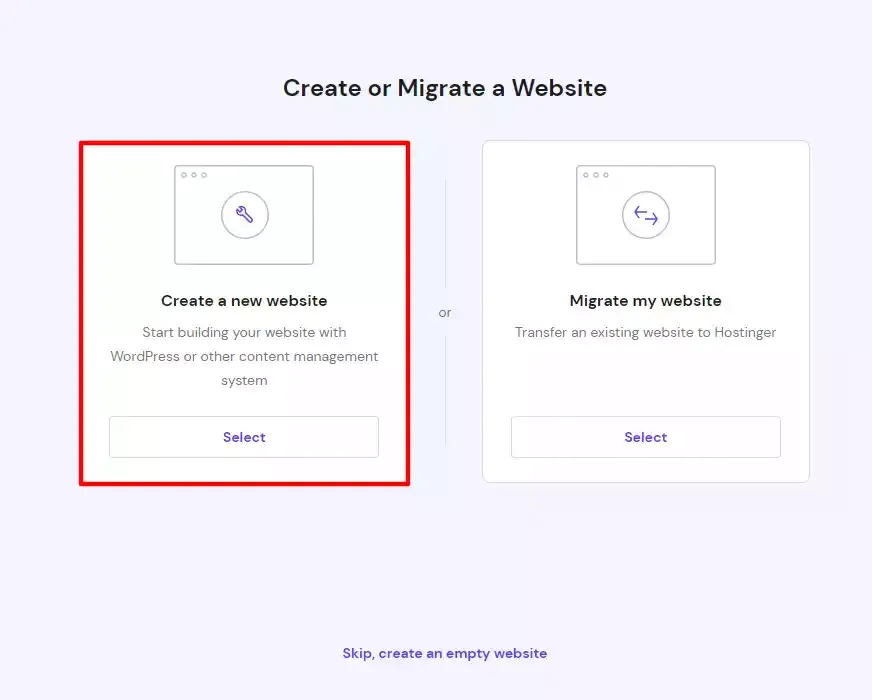
Now click on the Create a New Website option.
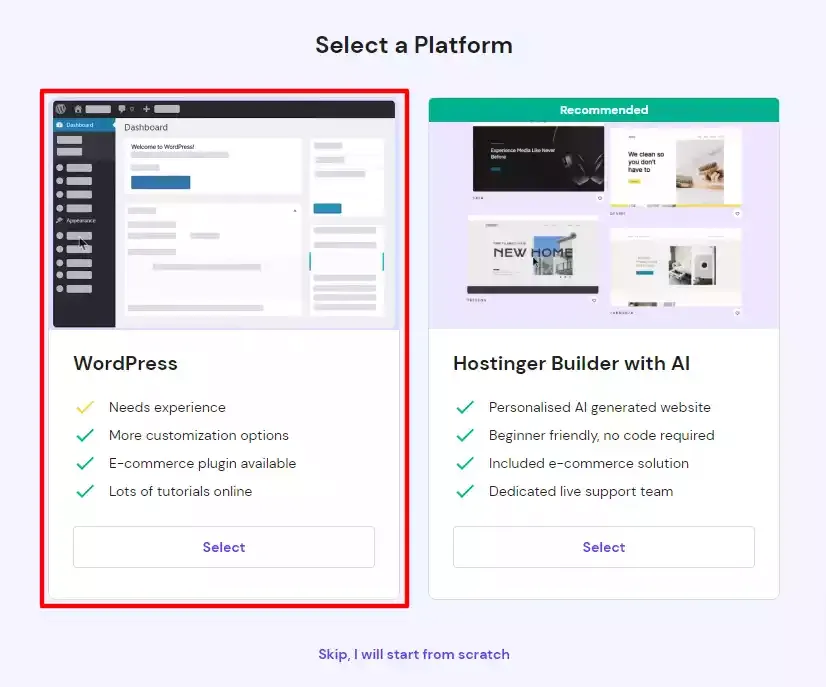
Now select the platform. Here You can choose wordpress or Hostinger Page builder for your website. I recommend you choose the first option wordpress
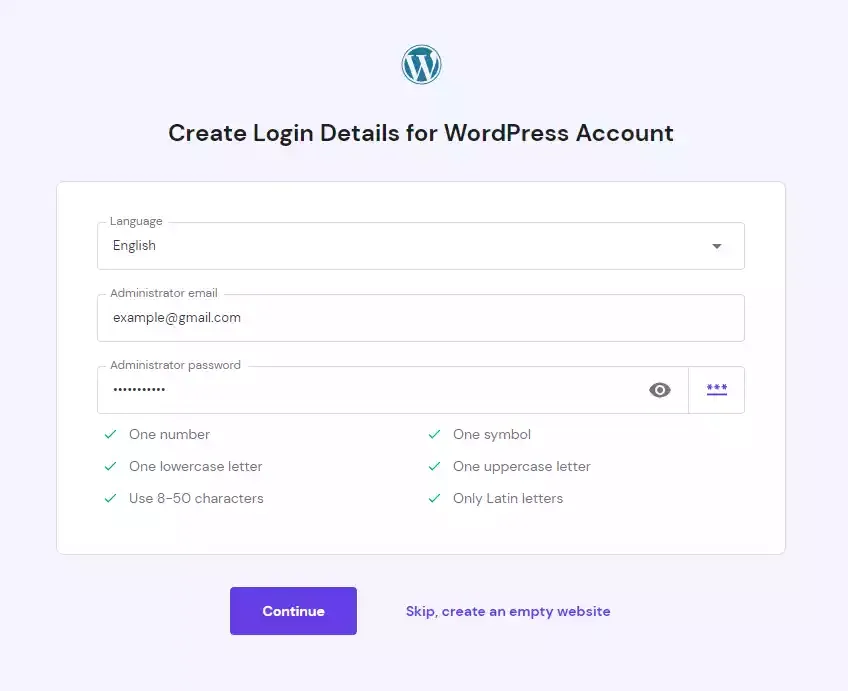
Now Select the Website language, Admin email, and password of your wordpress website and click on continue.
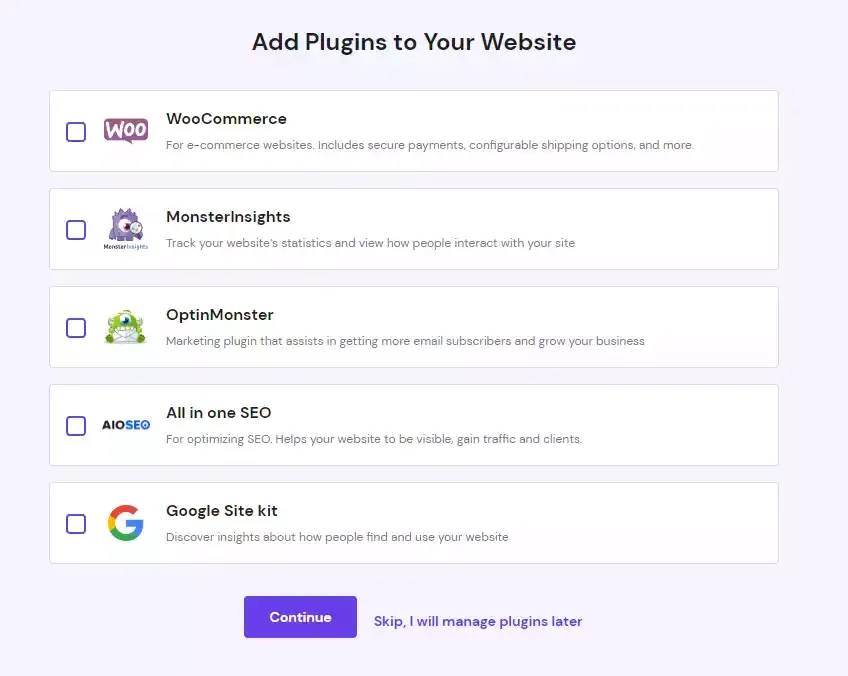
Now it will ask you to select some plugins, you can click on the skip button below. Now you may ask to choose a theme as well, just skip all options as you can set it later from your wordpress dashboard.
Now, click on the Select button under the Claim a Free Domain box.
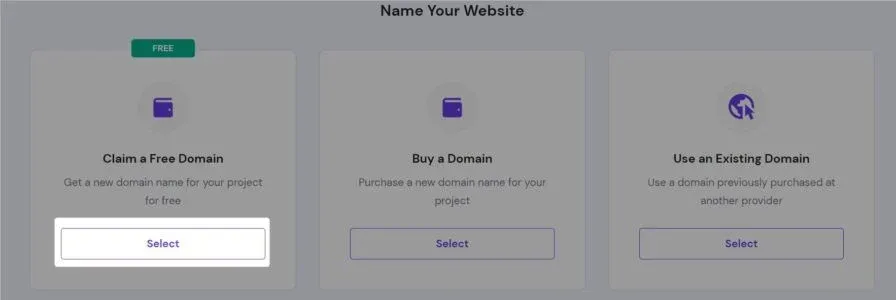
Now you can search for an available domain and install wordpress on it. In this way, you can claim a free domain name in hostinger
After that wordpress is installed you can log in to the website using the email address and password set before.
Why You Should Choose Hostinger
Affordability and Value for Money: Hostinger is known for its affordable hosting plans without compromising on quality. Their pricing structure is competitive, making it an attractive option for individuals and small businesses looking to establish an online presence on a budget.
Reliability and Performance: They have a strong uptime guarantee, minimizing the risk of your website experiencing downtime. It is fully optimized for better speed performance for your website, added building server caching, CDN integration, etc.
Ease of use: The user interface of hostinger is easy to use and you can easily install Wordpress, install an SSL certificate, Take backup, access file manager, etc using the Hpanel.
Customer Support: You can get 24*7 customer support through Live chat and Email. There is no Phone support available but You can easily connect with a live chat agent within 10 minutes.
Conclusion
In conclusion, Hostinger offers a fantastic opportunity to obtain a free domain name while benefiting from its reliable and affordable hosting services. By following the simple steps outlined in this article, you can secure a personalized domain name and establish your online presence with ease.
Thank you for reading this guide on how to get a free domain name from Hostinger. We hope this information has been helpful in your quest to establish a strong online presence. Start your online journey with Hostinger and unlock the potential of your website.


