How to Add Post Pagination in Blogger website?
Are you looking for a way to split long Blogger posts into different pages?
In this Blogger tutorial, I will show you how to add post pagination to your blogger website. So, you can break a single long blog post into multiple pages in Blogger.
So, let’s understand what is post pagination and what are the advantage and disadvantages of using it on your blog posts.
What is Post pagination?
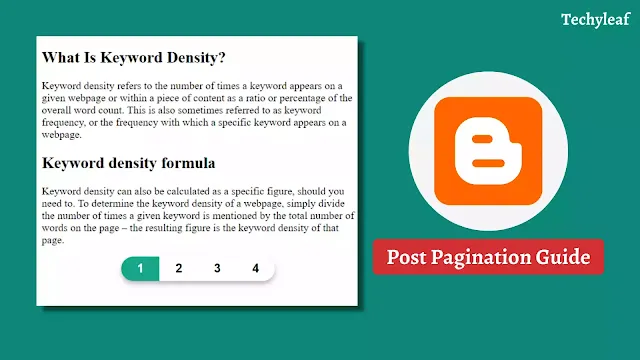
Post pagination is the technique to split long blog posts into multiple pages and users can navigate to other pages by clicking on the next and previous buttons.
Post Pagination improves the readability of your content and users can easily digest your content and read the section they are interested in.
It also helps in increasing page views and Ad revenue as user interaction will increase the webpage.
So, let’s see how to split Blogger posts into multiple pages.

How to Add Post Pagination in Blogger?
To add post pagination in Blogger, follow the steps given below.
Step-1: Go to Blogger dashboard and Open a blog post in HTML view.
Step-2: Now you have to split the blog posts in the below format.
<div class="page-content">

        <div class="page active">
        <!--Page 1 content Here-->
        </div>

        <div class="page">
        <!--Page 2 content Here-->
        </div>

        <div class="page">
        <!--Page 3 content Here-->
        </div>
 </div>
Step-3: Here replace the page content in between div classes. (like First page content replaces <!–Page 1 content Here–> )
Step-4: Now paste the pagination button code after all the blog post contents.
<!--Pagination Button-->
<div class="pagination-container">
        <div class="page-numbers-container">

        </div>
    </div>
Step-5: Now you have to paste the CSS code in the blog post or in the Theme code.
<style>
/* Post Pagination by Key2Blogging */

.pagination-container {
    display: flex;
    justify-content: center;
}

.pagination-container .page-numbers-container {
    display: flex;
    font-size: 18px;
    overflow: hidden;
    font-weight: bold;
    font-family: "raleway", sans-serif;
    border-radius: 20px;
    box-shadow: 0 4px 8px rgba(0, 0, 0, 0.3);
}

.page-numbers-container .page-number {
    padding: 8px 24px;
    transition: all 400ms;
}

.page-numbers-container .page-number:hover {
    background: #c5c5e9;
    cursor: pointer;
}

.page-numbers-container .page-number.active {
    background: #17A589;
    color: #fff;
}

/* Page Content */

.page-content .page {
    display: none;
}

.page-content .page.active {
    display: block;
}
</style>
step-6: Now paste the Javascript code just after the CSS code. (needed for Button click)
<script>
const pages = document.querySelectorAll(".page-content .page");
const pageNumbersContainer = document.querySelector(".page-numbers-container");

if (pageNumbersContainer) {

	let pn = localStorage.getItem("pageNumber") ? localStorage.getItem("pageNumber") : 0;

	const createPagination = () => {
	    pages.forEach((p, i) => {
	        const pageNumber = document.createElement("div");
	        pageNumber.classList.add("page-number");
	        pageNumber.textContent = i + 1;
	        pageNumber.addEventListener("click", () => {
				localStorage.setItem("pageNumber", i);
				location.reload();
	        })

	        pageNumbersContainer.appendChild(pageNumber);
	    })

	    document.querySelector(".page-number").classList.add("active");
	    pages[0].classList.add("active");
	}

	createPagination();

	const pageNumbers = document.querySelectorAll(".page-numbers-container .page-number");

	const activatePage = (pageNumber) => {
	    pages.forEach(p => {
	        p.classList.remove("active");
	    })

	    pages[pageNumber].classList.add("active");

	    pageNumbers.forEach(p => {
	        p.classList.remove("active");
	    })

	    pageNumbers[pageNumber].classList.add("active");

		localStorage.removeItem("pageNumber");
		history.scrollRestoration = "manual";
	}

	activatePage(pn);
}
</script>
Now publish your blog posts and you have successfully added the post pagination to your Blogger website.
In this way, you can easily break long posts into multiple pages in Blogger and give your users a better user experience on the website.
If you have any doubts then you can ask in our Telegram Group or ask in the Comment box.


Hello there!
Is there a way to create this pagination without reloading the page each time you click the pagination button?
Watch the Updated video For this — https://youtu.be/QddeEO6xaRc